
Accounts and modpacks
The modpack tells the launcher what to install and which server to join. Accounts link the launcher login to the login your server already uses.
Modpacks
A modpack brings together the server address, the Minecraft version and the files the player needs to join. You create as many as your plan allows.
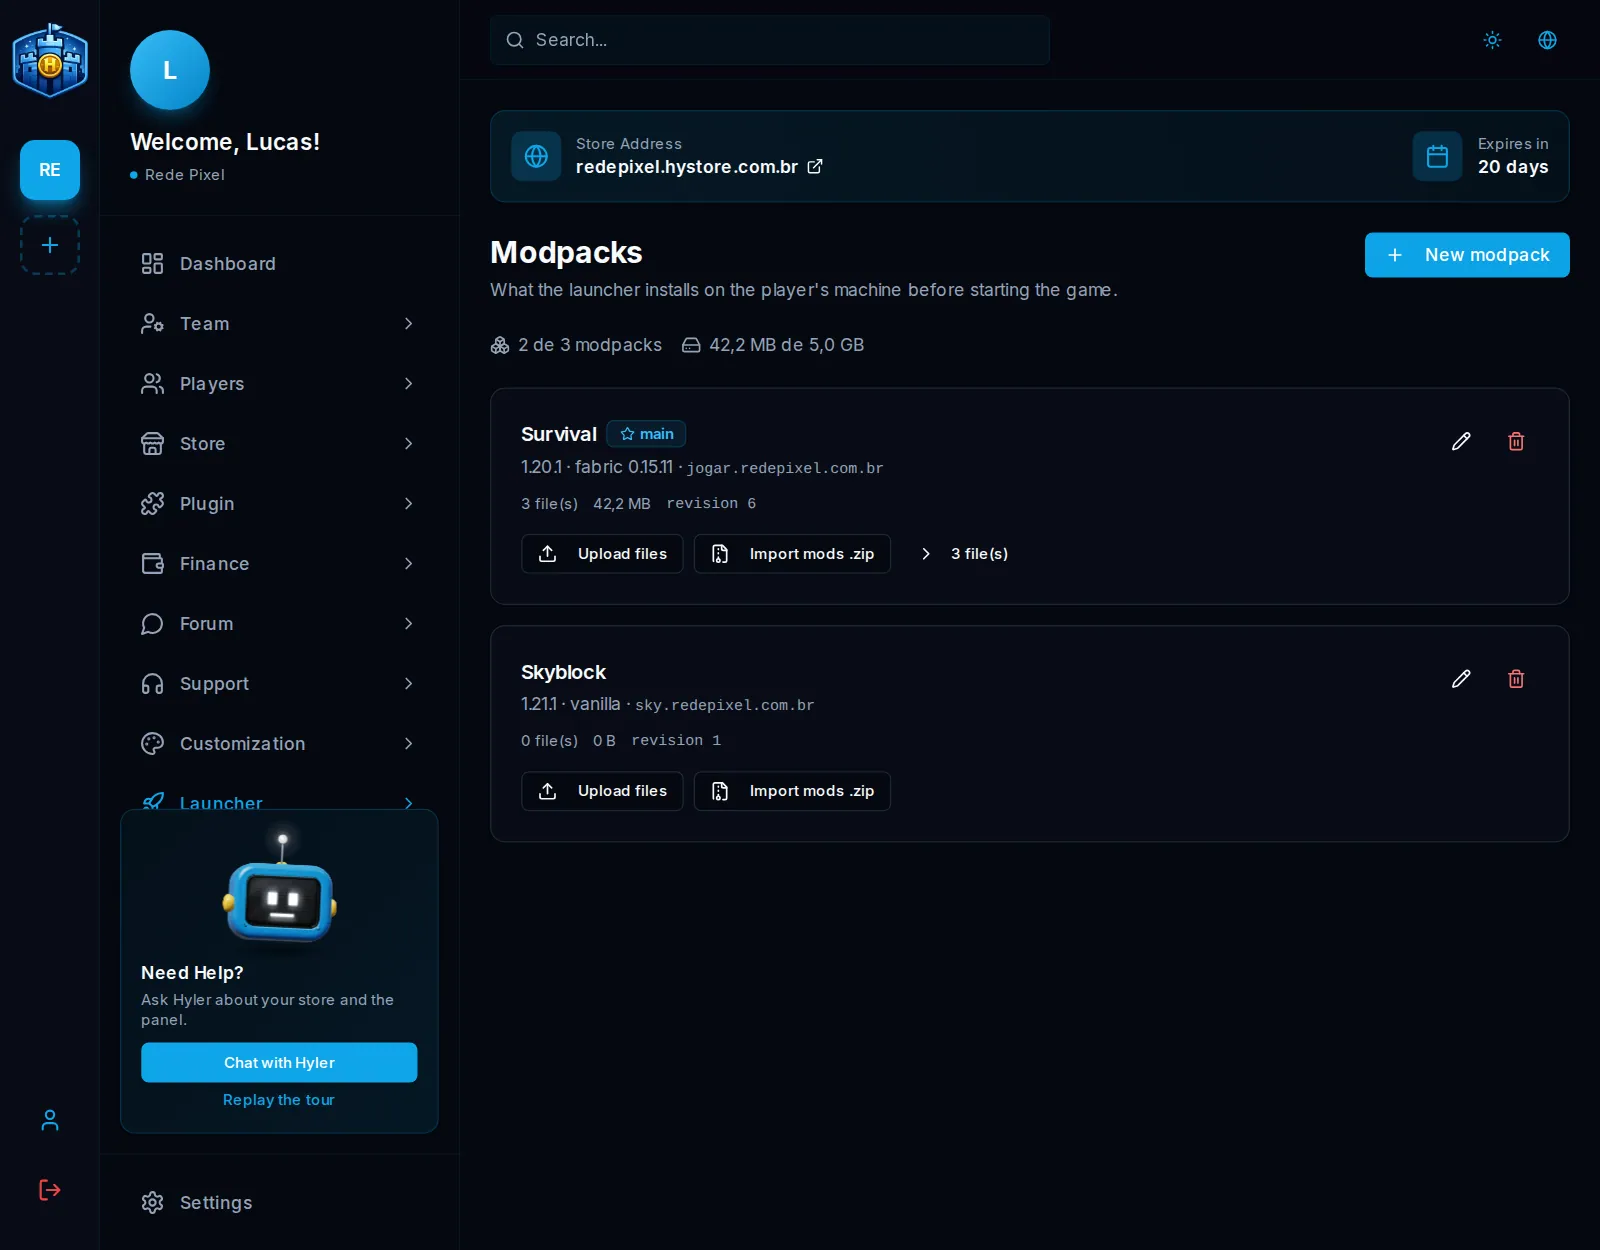
Create a modpack
- In Launcher > Servers, click New modpack.
- Fill it in as in the example below.
- Click Create modpack.
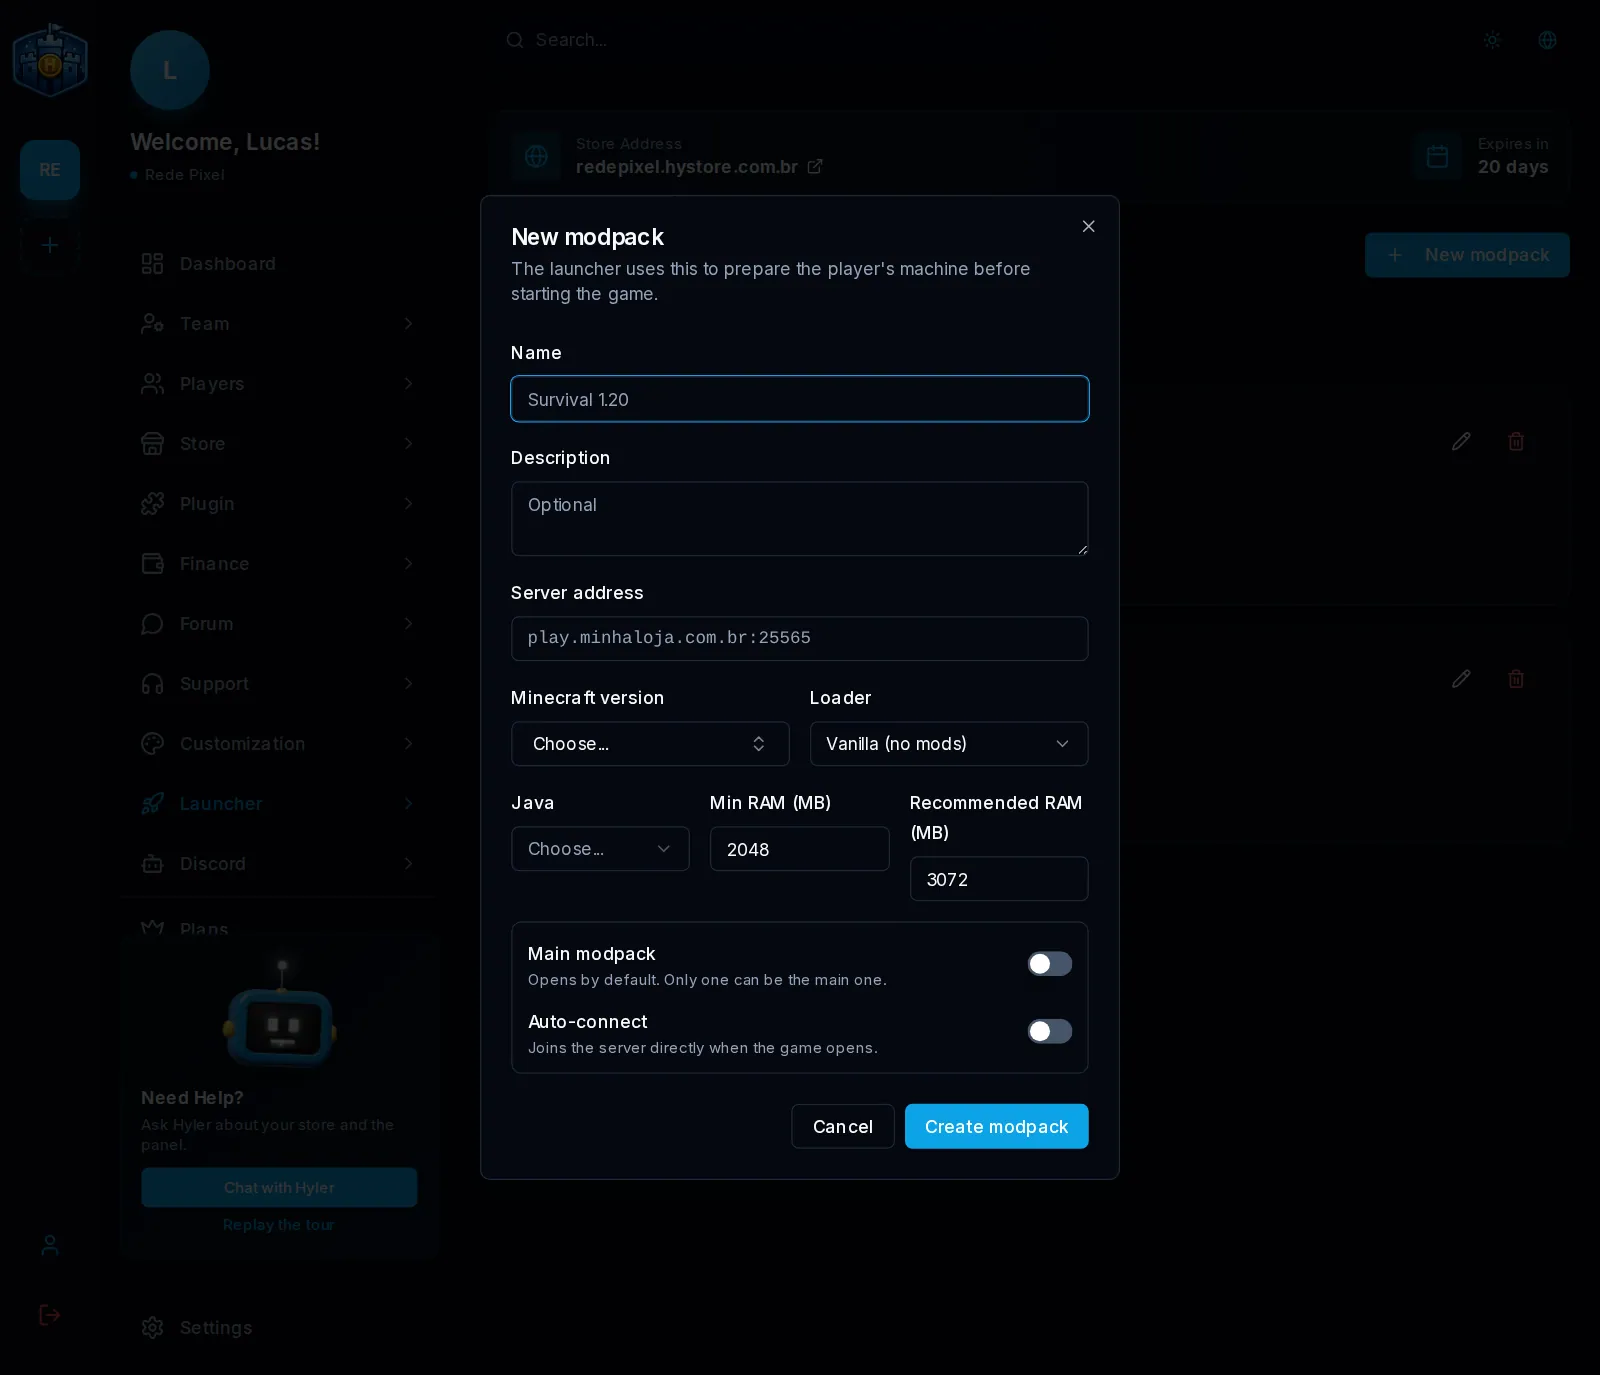
Name: Survival
Server address: jogar.redepixel.com.br
Minecraft version: 1.20.1
Loader: Fabric
Loader version: 0.15.11
Java: 17
Min RAM: 2048 MB
Recommended RAM: 4096 MB
| Field | What it does |
|---|---|
| Loader | Vanilla to play without mods, or your server's mod loader |
| Java | The screen shows the minimum for the chosen version |
| Min RAM and Recommended RAM | The minimum cannot be higher than the recommended |
| Main modpack | It opens by default. Only one can be the main |
| Auto-connect | Joins the server directly when the game opens |
Upload the files
On the modpack card:
- Upload files: up to 5 at a time.
.jaris a mod,.zipis a resource, and configuration files work too; - Import mods .zip: for many mods at once, put them all in a
.zip. The dashboard opens it, uploads one by one and shows a report of what was left out.
In the file list, Optional lets the player choose whether they want that file, and Android says whether it also goes to the phone.
Players get it on the next start. What you change joins the changelog on its own.
Changelog
In Launcher > Changelog, the list builds itself as you change the modpacks.
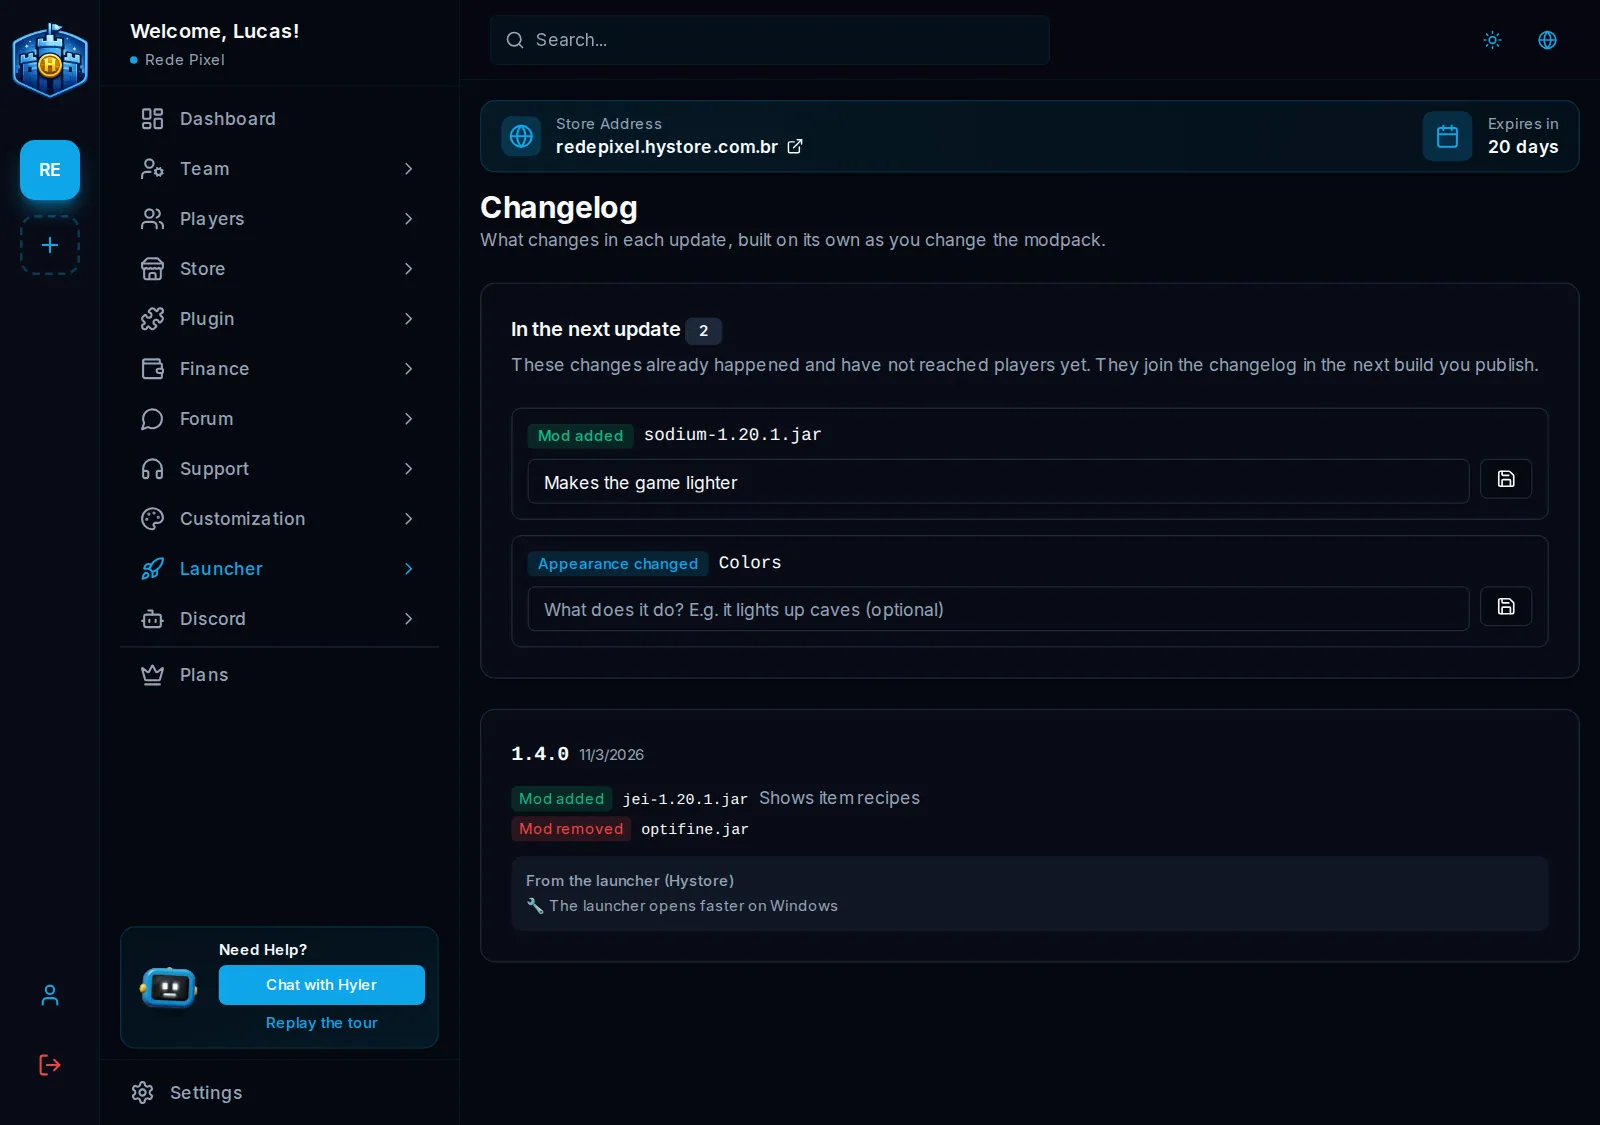
In the next update shows what has not reached players yet: it joins the changelog in the next published build. On each change, write what it does if you want, because players understand a sentence better than a file name:
sodium-1.20.1.jar: makes the game lighter
Accounts and login
If your server uses nLogin, AuthMe or its own database, point Hystore to its accounts table. This way the player signs in to the launcher with the same nick and password as the server. Without it, the launcher refuses to create accounts: player accounts are born on the server.
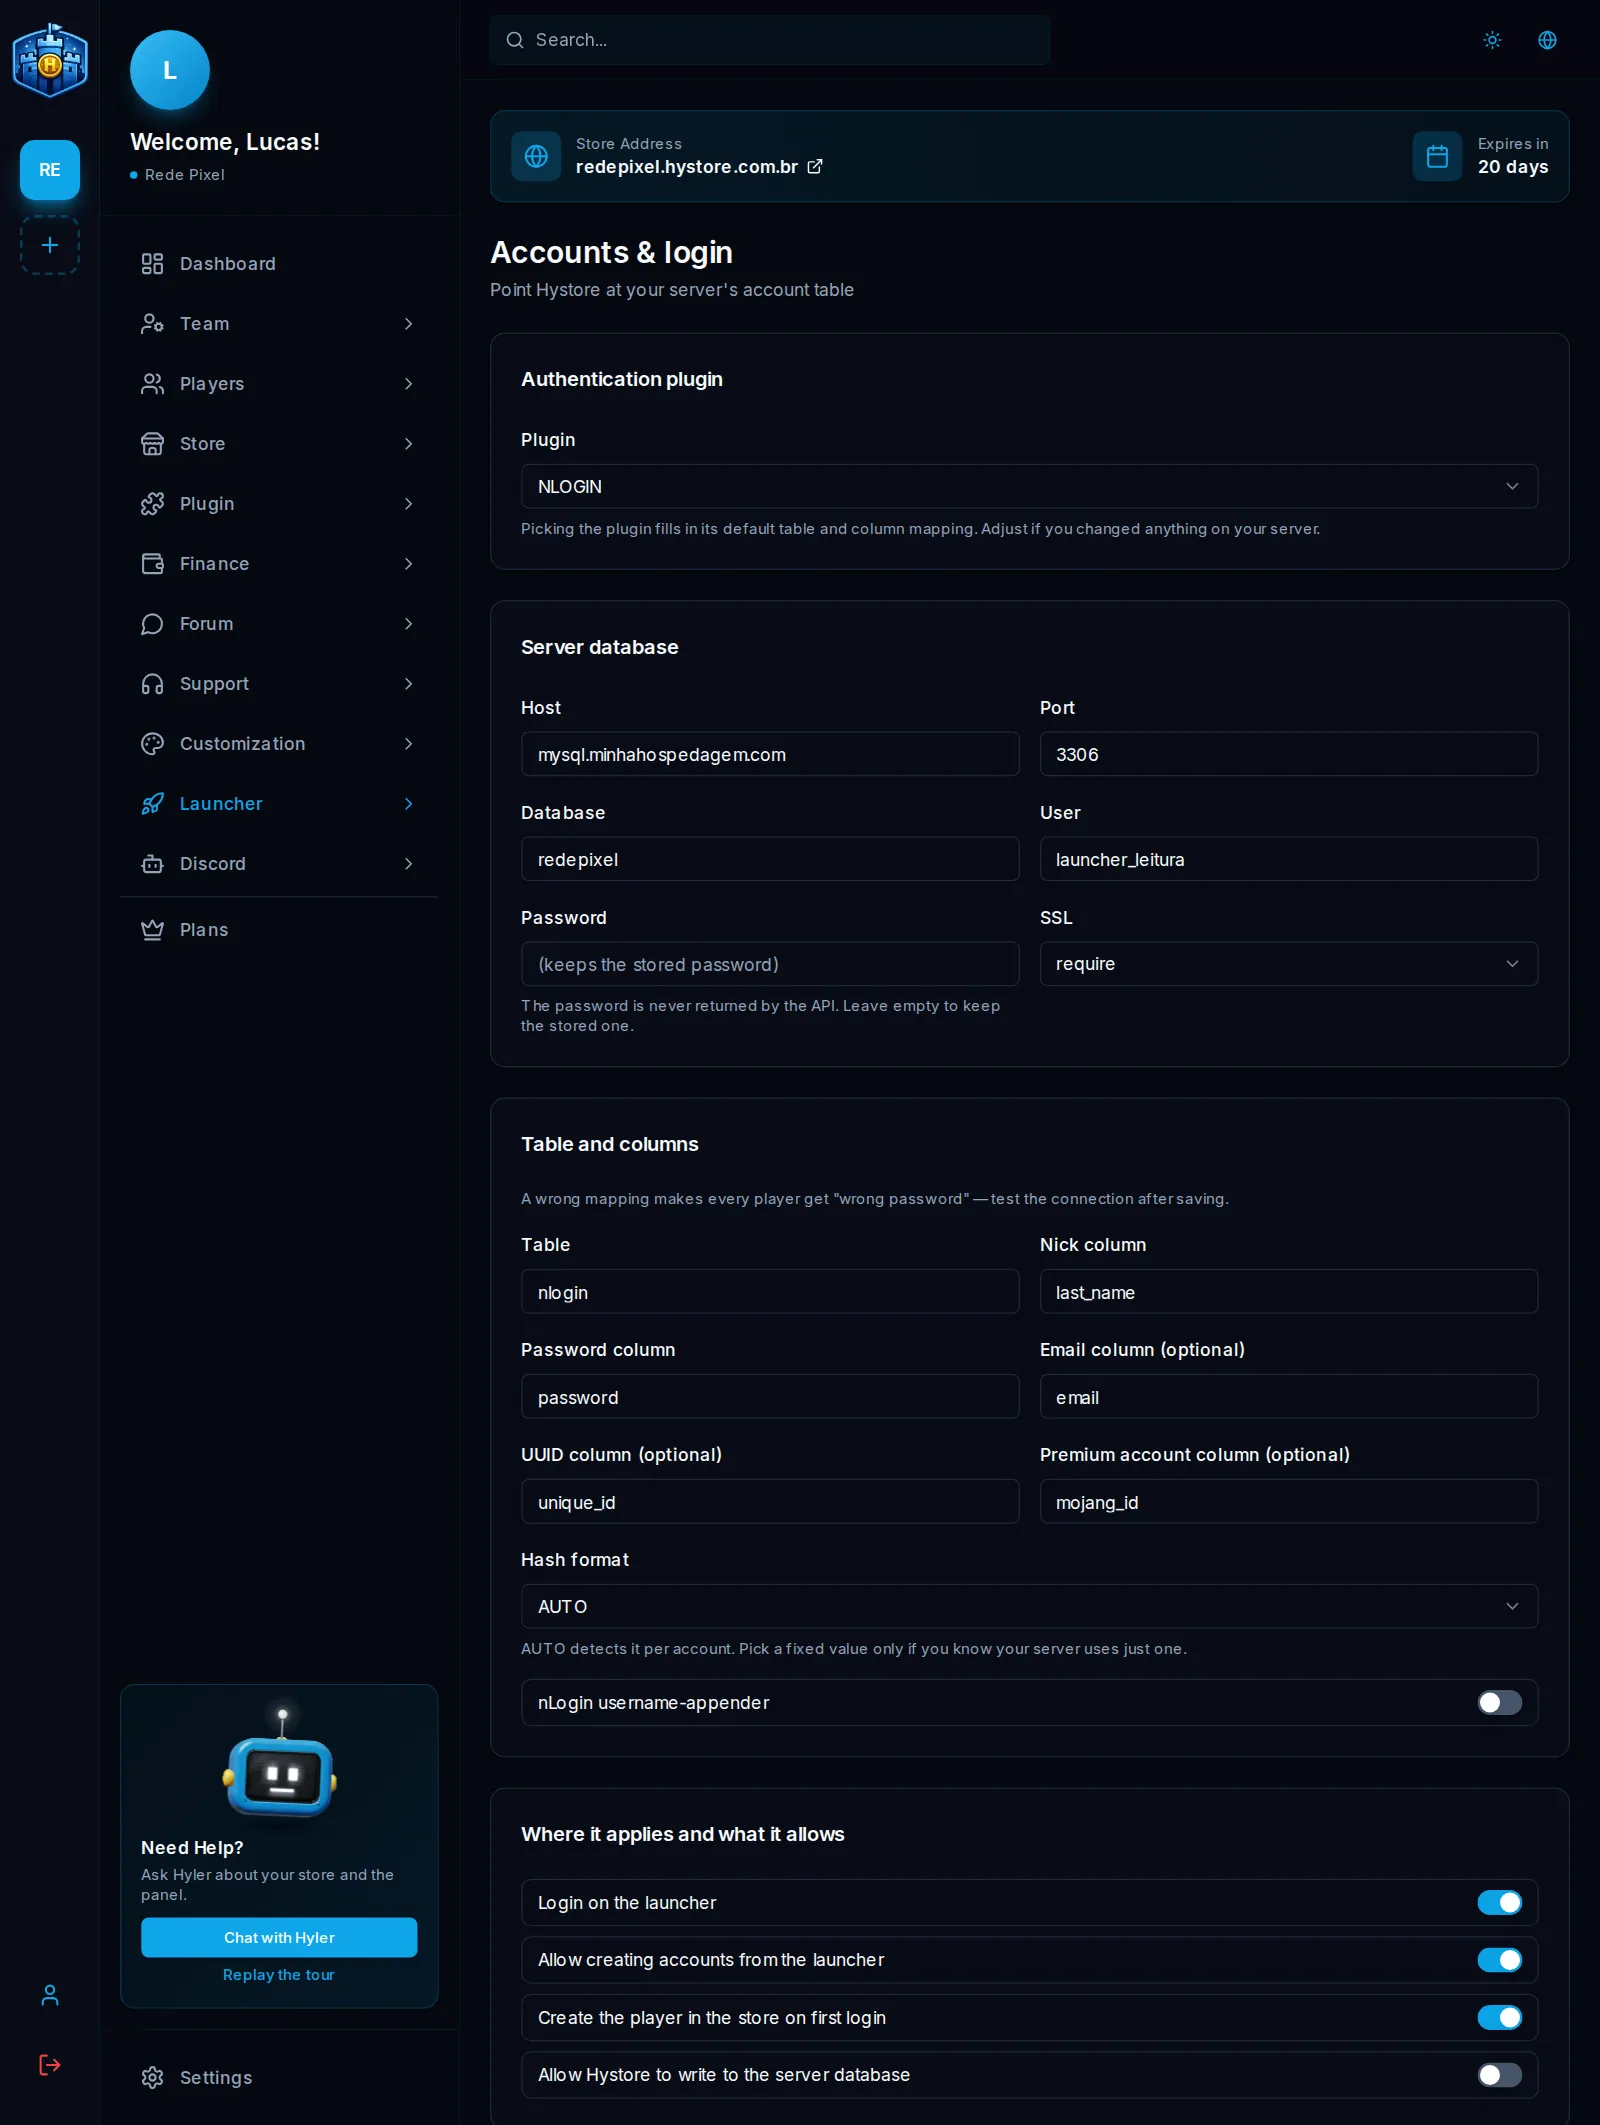
- In Launcher > Accounts & login, pick the Plugin. The table and column mapping is filled in with its default. Adjust it if you changed something on your server.
- Under Server database, fill in Host, Port, Database, User and Password.
- Under Hash format, leave AUTO, which detects each account's format.
- Click Save and then Test connection.
| Option | What it does |
|---|---|
| Login on the launcher | Turns on login with this configuration |
| Allow creating accounts from the launcher | The player creates the account without joining the server first |
| Create the player in the store on first login | Creates the player in the store the first time they sign in |
| Allow Hystore to write to the server database | Password changes and weak hash migration write to your table. Leave it off if you do not need it |