
Team and access roles
You do not need to run the store alone. In Team, in the menu, you bring people into the dashboard and choose what each one can see and do. The group has three screens: Sub-users, Access Roles and Audit Logs.
The order that works: create the roles first, then invite the people.
Create an access role
A role is a set of permissions, like "Support" or "Administrator". Changing a role applies right away to every member who has it.
- Open Team > Access Roles and click New role.
- Give it a Name (for example,
Support) and, if you like, a Description of what the person does. - In Permissions, check what the role can do. Permissions come in groups by area, like Products, Orders, Players, Coupons, Support Tickets, Posts, Wiki, Forms, Finance, VIPs and Discord. Each group has the view, create, edit or manage of that area.
- Click Create role.
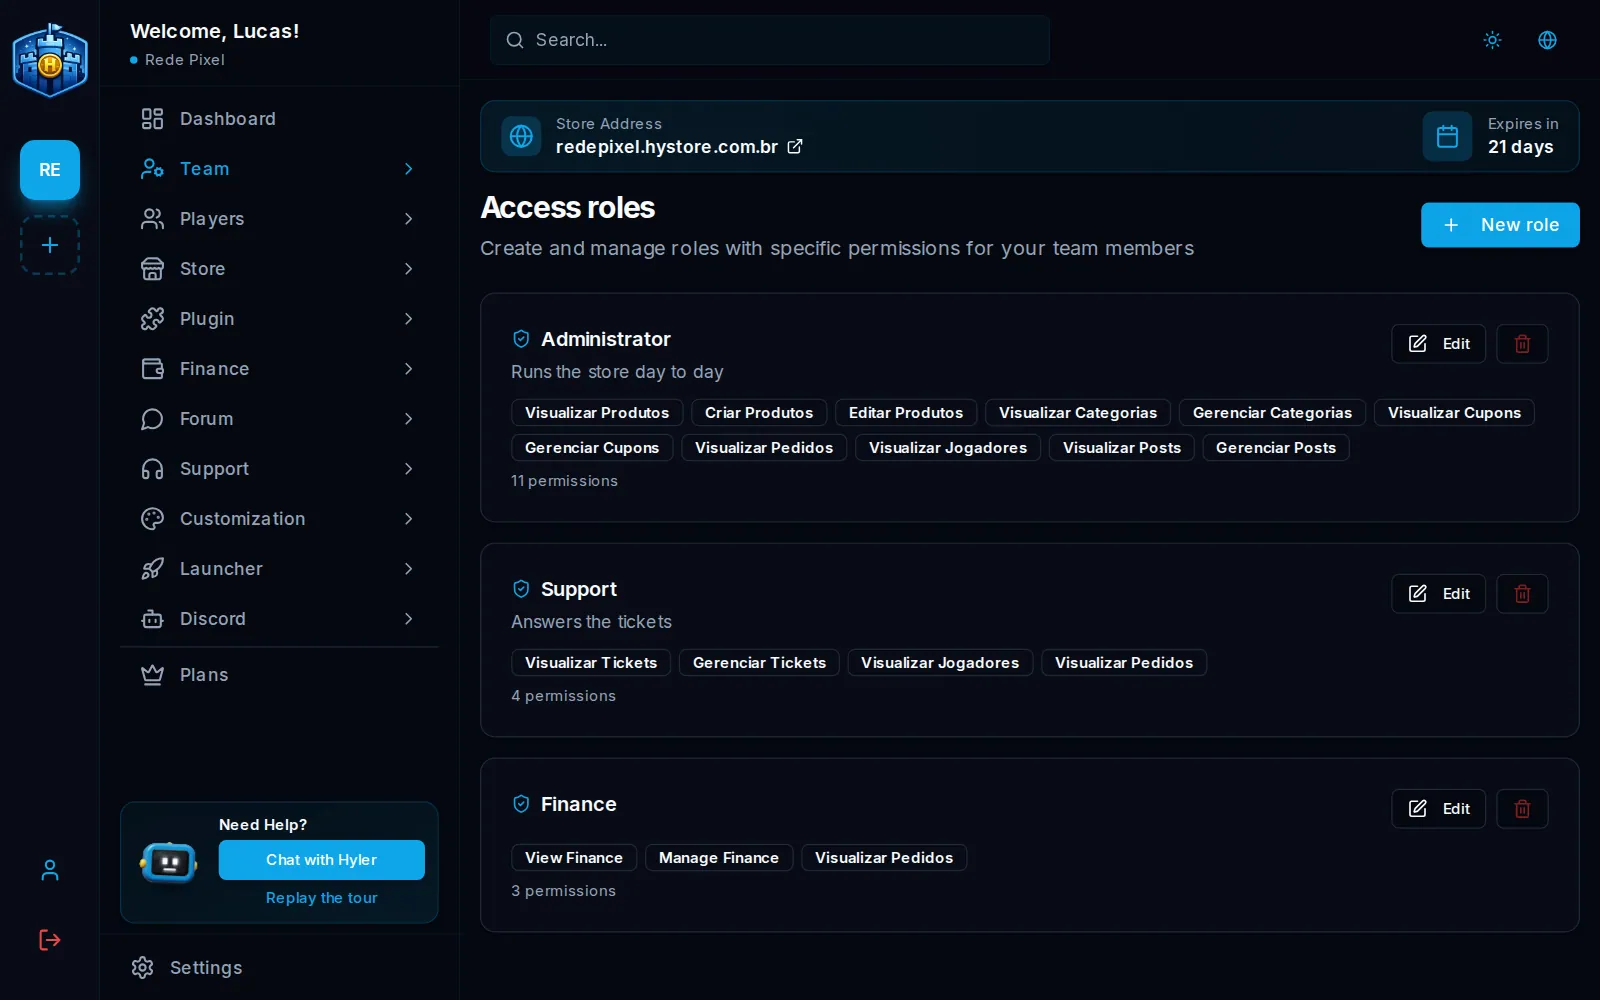
Every role needs at least one permission. To delete a role, use the trash icon; first make sure nobody is using that role.
Permissions worth a closer look
- Finance has three levels: View Finance, Manage Finance and Receive budget alerts (the person only gets the alert by email and on Discord, without opening Finance).
- Code theme separates who views, who edits, who publishes and who creates access keys for tools and AI.
- In a digital product store the Digital products group shows up, with managing files and keys, and the Servers group goes away.
Invite someone to the team
- Open Team > Sub-users and click Invite.
- Fill in the person's Email and Name.
- Pick the Role. It is required; if there is none yet, the Create role link takes you to the roles screen.
- Click Invite.
Whoever has no Hystore account yet gets one with the invite and receives the email to log in. Whoever already has an account starts seeing your store on the store bar.
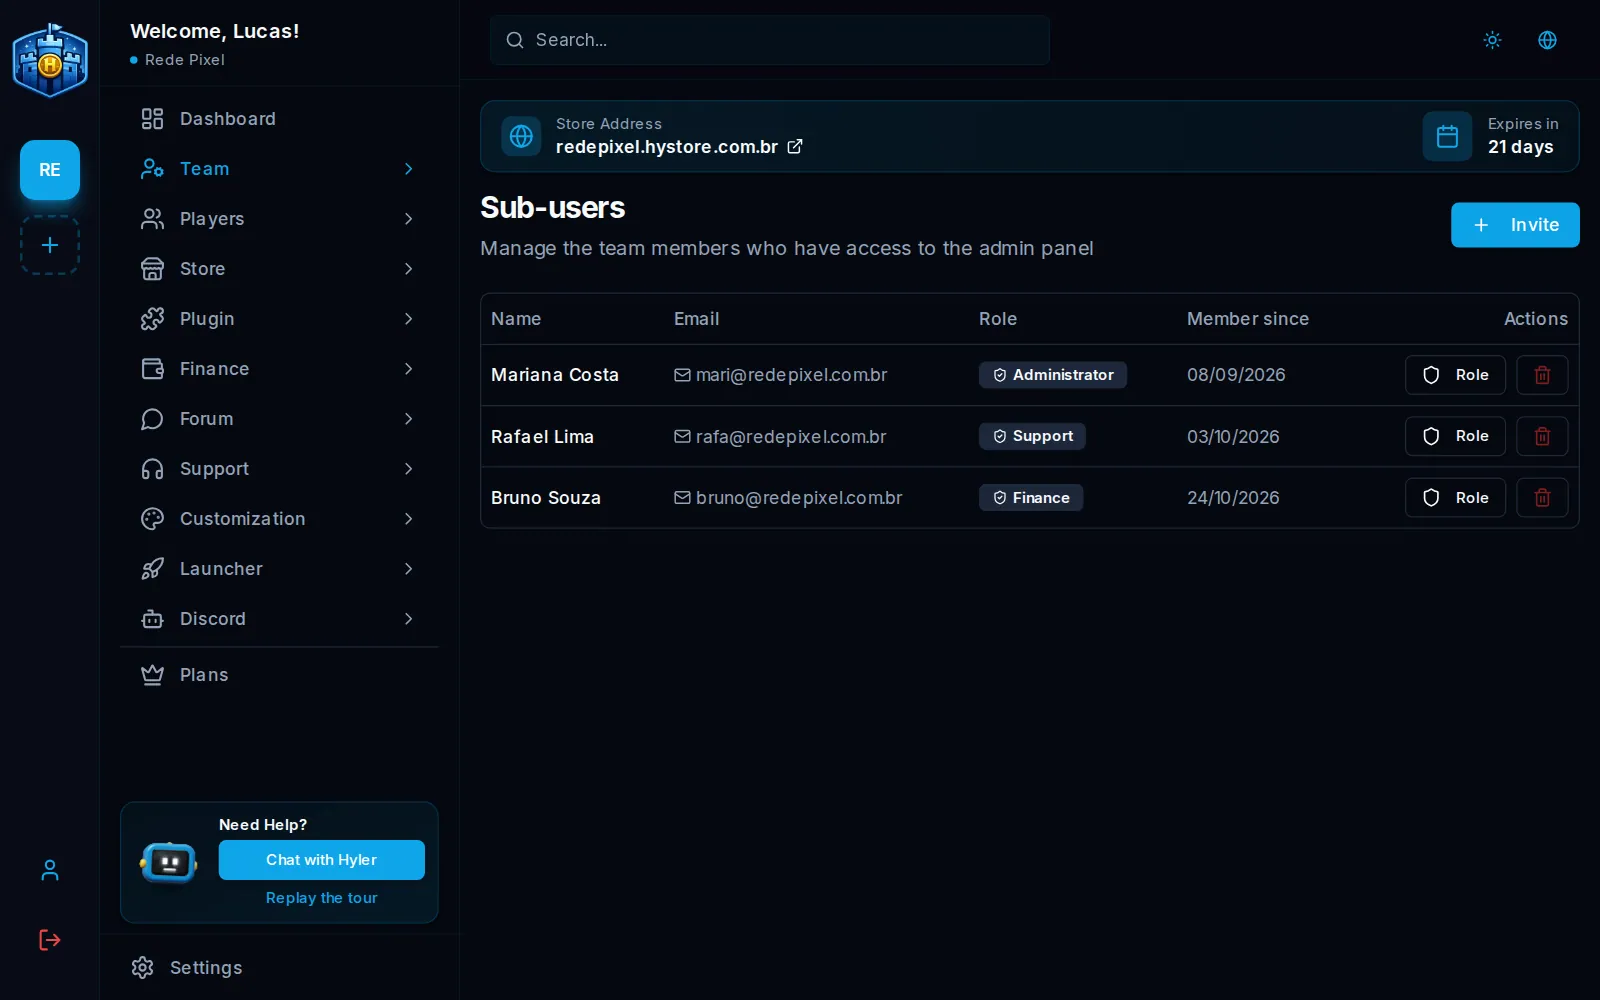
In the list, the Actions column has:
- Role: opens Change role to switch the person's role;
- Remove: takes the person out of the store. Dashboard access ends right away.
Audit Logs
Team > Audit Logs shows what was done in the store: who did it, when and on which resource. It helps explain a change ("who changed the VIP price?") and follow the team's work.
- Filter by action or by resource type (like Ticket or Product).
- Click Search.
- Open a record to see the details. See the original record shows the action code and who acted.
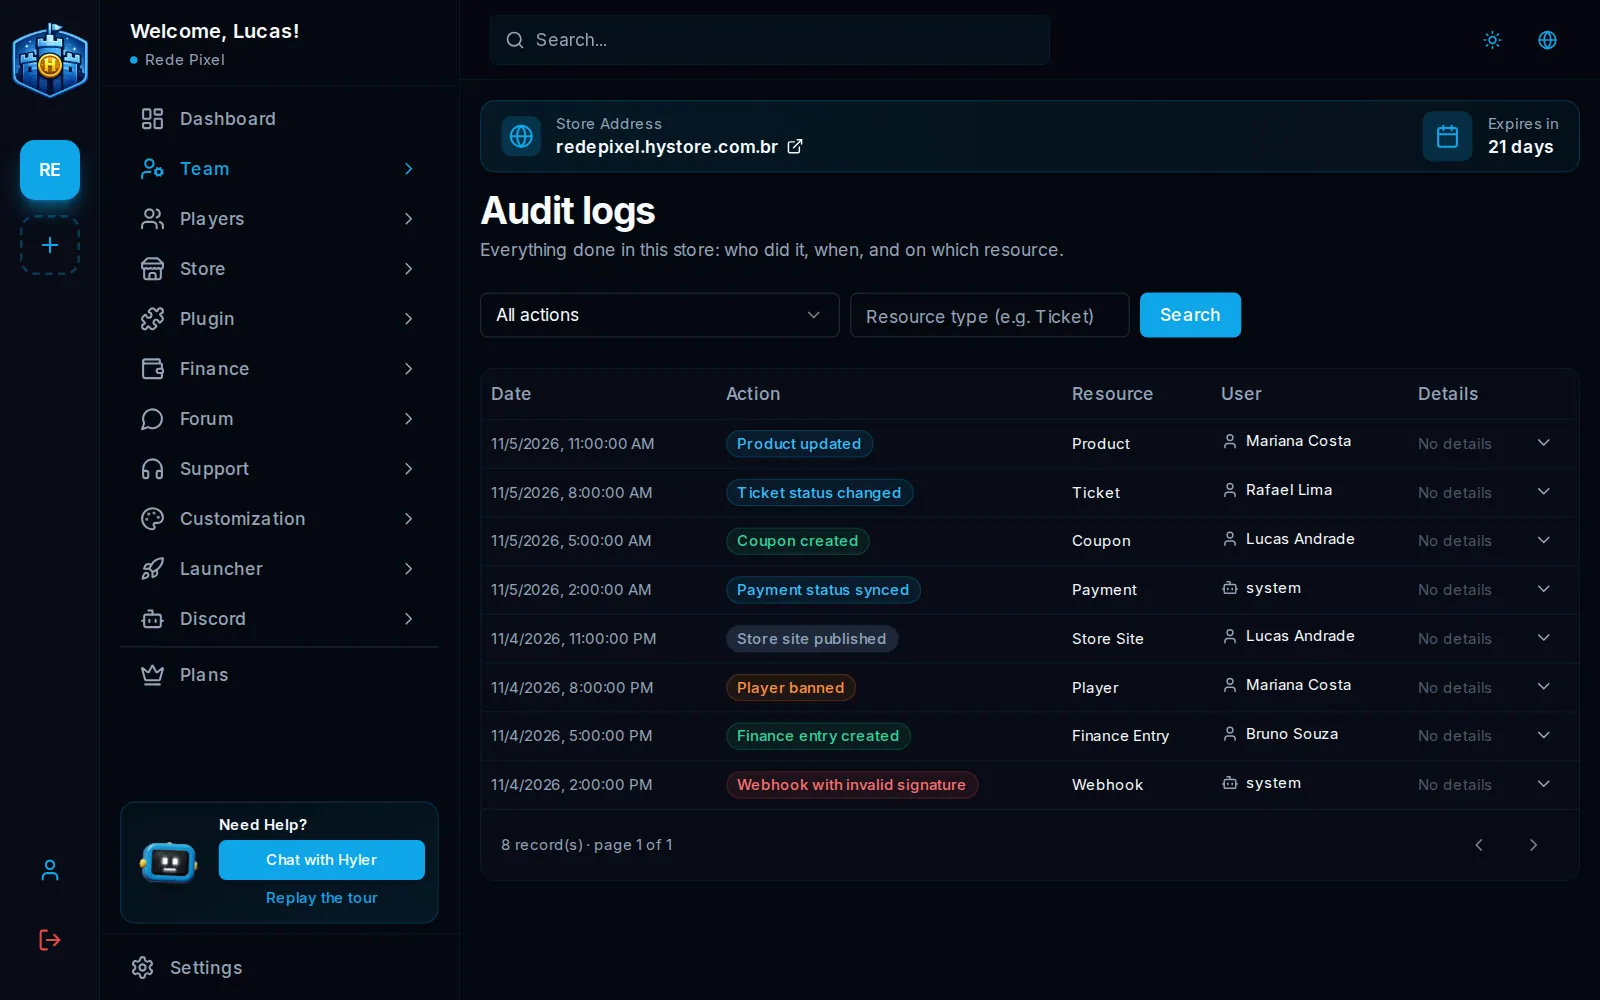
What the platform itself did, like approving a payment, shows as System. Alert actions, like a webhook signature that does not match, are highlighted.